10 Best Camera Backpacks for Every Photographer
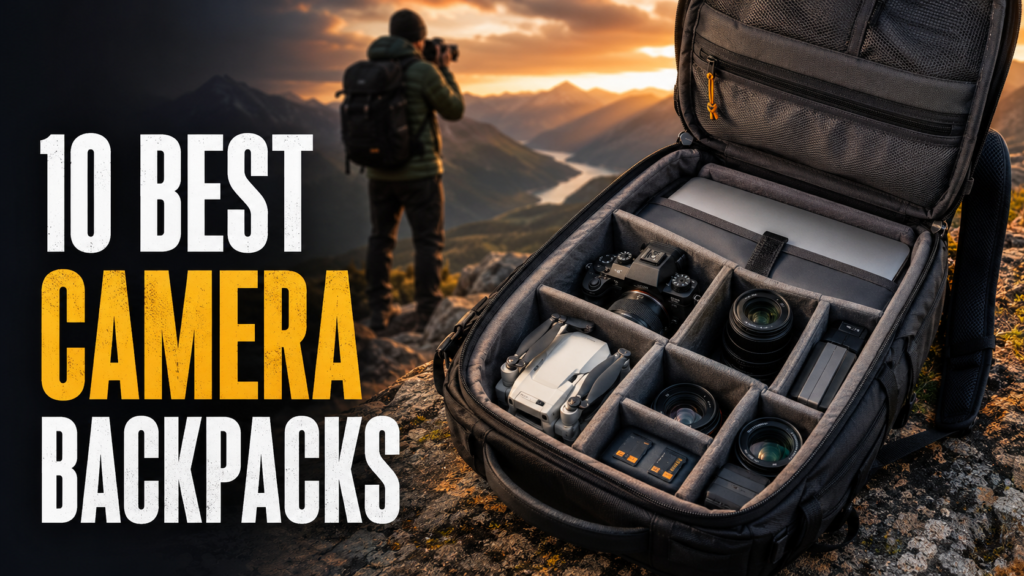
10 Best Camera Backpacks for Travel, Photography, and Everyday Gear
The best camera backpacks do much more than surround a camera with foam. They protect delicate bodies and lenses, keep batteries away from loose metal, make memory cards easy to find, and let me reach the right gear before a fleeting shot disappears.
That is why I never choose a photography backpack by capacity alone. I look at how the dividers support lenses, whether the access style suits the way I shoot, and how comfortably the harness handles a dense load. Space for a laptop, drone, tripod, filters, chargers, jacket, and water can matter just as much as the camera compartment.
A beginner carrying one mirrorless body and two small lenses needs a very different bag from a wedding photographer packing two bodies, fast zooms, flashes, and backups. A travel creator may need an even split between camera gear and personal items.
This guide compares ten genuinely different options. I have not pretended to personally field-test every bag. Instead, I have checked current manufacturer information and judged each layout from a practical bag-user perspective, including the compromises I would want to know before buying.
Quick Picks: Best Camera Backpacks
- Best Overall: Peak Design Everyday Backpack 20L, for flexible dividers and exceptionally quick access.
- Best for Travel Photography: WANDRD PRVKE 31L, for its camera, travel, and personal-space balance.
- Best for Mirrorless Cameras: Tenba Fulton v2 16L, for discreet styling and a sensible split layout.
- Best for DSLR Gear: Lowepro ProTactic BP 450 AW III, for high protection and extensive access.
- Best for Drones: PGYTECH OneMo 2 25L, for adaptable storage and creator-focused organization.
- Best for Hiking Photography: Shimoda Explore V2 30, for an outdoor harness and modular core-unit system.
- Best Camera Backpack with Laptop Storage: Think Tank Airport Essentials 26L, for dense professional gear and travel-oriented tech carry.
- Best Budget-Friendly Option: Brevitē Jumper, for a low-key everyday design suited to smaller kits.
- Best Everyday Camera Backpack: NOMATIC McKinnon Camera Pack 25L, for structured organization and a configurable interior.
What Makes a Good Camera Backpack?
Protection That Matches the Gear
I want padding around the sides, base, and camera compartment, not just soft fabric touching the equipment. The dividers should hold a lens snugly without forcing pressure onto switches, screens, or a mounted lens.
A durable base matters because the bag will eventually meet concrete, station floors, and damp ground. Even so, no padded backpack should be treated like a hard case. I still lower camera gear rather than dropping it.
Dividers That Stay Where I Put Them
Adjustable dividers let me build slots around the equipment I actually own. Thin folding dividers are efficient for compact mirrorless kits, while thicker foam can feel more reassuring around heavy DSLR bodies and long lenses.
The layout should also leave space to grip each item. A perfectly dense Tetris arrangement looks efficient until I need to pull one lens out without lifting three others.
The Right Access Style
Side access is excellent when I want the camera quickly. Rear access lets me see the entire kit and keeps the opening against my back while walking. Top access suits one ready camera, while a clamshell opening is better for deliberate packing.
I pay close attention to where the zippers stop. A quick-access door is only useful if my camera and mounted lens can pass through it without catching.
Real Organization for Small Accessories
Batteries, SD cards, cables, filters, a card reader, and a small SSD can disappear inside a large pocket. Clear or labeled pockets make more sense than one deep admin cavity.
Loose batteries deserve particular care. The PHMSA guidance for camera operators says spare lithium batteries belong in carry-on baggage and must be individually protected.
Tripod, Drone, and Laptop Carry
A tripod holder should prevent the tripod from swinging into doors or people. I also check whether it occupies the only bottle pocket. For drone use, the dividers must protect the aircraft, controller, batteries, and propellers without squeezing them together.
Laptop storage should be suspended from the bottom if possible. I prefer a separate device opening because it prevents me from exposing camera gear at airport security.
Weather Resistance Without False Confidence
Weather-resistant fabric and coated zippers can slow light rain, but they do not make every seam waterproof. An included rain cover is more reassuring in sustained rain, although water can still reach the harness side.
Before bad weather, I check a reliable forecast such as the National Weather Service and carry a dry bag or waterproof pouch for vulnerable accessories. Weather resistance buys time. It does not replace sensible protection.
Comfort With a Dense Load
Camera gear becomes heavy quickly. Wide shoulder straps, a stable back panel, a sternum strap, and a useful hip belt can matter more than an extra pocket.
The REI guide to fitting and adjusting a backpack is useful even for camera bags. A good harness still needs to be sized and adjusted correctly.
Space Beyond the Camera Cube
This is where many photography backpacks frustrate me. An enormous padded bay can carry every lens I own but leave nowhere for a jacket or lunch.
For travel and hiking, I prefer a clear split between camera equipment and normal belongings. For studio or wedding work, I am happier to dedicate nearly the entire interior to gear.
Best Camera Backpacks: Ranked Picks
1. Peak Design Everyday Backpack 20L, Best Overall
The 20L Everyday Backpack earns my overall pick because it moves naturally between photography and ordinary daily carry. Its MagLatch top and dual side zippers give me several ways to reach gear, while the folding FlexFold dividers avoid the fixed grid feeling of traditional foam inserts.
- Best for: Urban photographers, commuters, travelers, and mixed everyday use
- Camera gear capacity: Configurable light to medium kit
- Laptop storage: Dedicated device sleeve, current fit depends on bag size
- Tripod carry: Yes, using exterior carry straps or side pocket
- Main strength: Fast, flexible access
- Main tradeoff: Dividers require careful setup
Why It Works for Camera Gear
I can keep a camera near either side opening and place smaller lenses on divider shelves above or below it. That makes the bag feel quick during street or travel photography because I do not need to expose the full compartment.
The side pockets and external straps can manage a compact tripod, bottle, or jacket. Its clean shape also avoids advertising a large professional camera kit.
What Could Be Better
FlexFold dividers are clever, but they are not automatically better for every setup. Small accessories can migrate between gaps, and heavy round lenses may feel more secure in a conventional foam grid.
The harness is appropriate for everyday loads, but I would choose a more hiking-focused frame for hours on steep trails.
Best for This Type of Photographer
It makes the most sense for a mirrorless user, travel shooter, or content creator carrying one body, a few lenses, and daily tech. It also works for someone who wants one polished backpack rather than separate office and camera bags.
Who Should Skip It
Skip it if you carry two large gripped bodies, several long lenses, or need a substantial hip belt. A full professional camera bay will use the space more efficiently.
Bottom Line
This is the camera backpack I would choose when speed and versatility matter more than maximum equipment density. It is genuinely useful beyond photography, which helps justify owning it.
2. WANDRD PRVKE 31L, Best for Travel Photography
The PRVKE combines a clamshell body, side camera access, expandable roll-top space, and a travel-friendly silhouette. The current V4 is offered in several sizes and configurations, so the selected camera cube matters as much as the outer backpack.
- Best for: Travel photographers and hybrid camera-personal packing
- Camera gear capacity: Depends on selected camera cube
- Laptop storage: Dedicated sleeve, verify fit on the current size
- Tripod carry: Yes
- Main strength: Excellent travel balance
- Main tradeoff: Cube and accessories affect total cost
Why It Works for Camera Gear
The side opening lets me position a ready camera where it can be reached without laying the bag down. At a hotel, the clamshell opening gives me a much clearer view of the complete setup.
The roll-top is valuable for the soft, awkward items camera bags often neglect. I can reserve it for a jacket, snacks, or a compact packing cube while the camera cube handles fragile equipment below.
What Could Be Better
The PRVKE is a system rather than one universally identical setup. Buyers need to check which camera cube, straps, or waist belt are included in the exact bundle.
Roll-tops also add steps when the item I want has settled near the bottom of the upper section.
Best for This Type of Photographer
I would recommend it to travel creators, vloggers, and photographers who want one bag for a camera kit plus genuine personal space.
Who Should Skip It
Skip it if you want the lightest possible camera bag or a simple, inexpensive package with no configuration decisions.
Bottom Line
The PRVKE is my strongest camera backpack for travel because it acknowledges that photographers also carry clothing, food, and normal daily gear.
3. Shimoda Explore V2 30, Best for Hiking Photography
The Explore V2 30 is designed around travel and landscape photography rather than casual commuting. Its adjustable harness, rear access, side access, and modular core-unit approach make it much more convincing when terrain and carrying comfort matter.
- Best for: Landscape, hiking, and destination photographers
- Camera gear capacity: Depends on chosen core unit
- Laptop storage: Included, device fit varies
- Tripod carry: Yes
- Main strength: Outdoor-oriented harness
- Main tradeoff: Core unit adds another buying decision
Why It Works for Camera Gear
Rear access lets me place the bag harness-up on damp or dusty ground, open the camera section, and avoid pressing muddy shoulder straps against my clothing afterward. Side access still gives me a faster route to a ready camera.
The modular core unit allows different levels of camera storage. That is particularly helpful when one trip needs a long lens and another needs more clothing.
What Could Be Better
The complete setup can become expensive once a suitable core unit is included. The outdoor design also looks and feels more technical than many commuters need.
No backpack makes a heavy lens light. I would still limit unnecessary glass before a long climb.
Best for This Type of Photographer
It suits landscape photographers, hiking creators, and travelers who spend meaningful time away from smooth city surfaces.
Who Should Skip It
Skip it if most shoots happen between a car, studio, and office, or if your kit is only a compact camera and one lens.
Bottom Line
The Explore V2 30 is the bag I would trust most here for camera backpack hiking duties because the carry system and access design serve the trail, not just the spec sheet.
4. Lowepro ProTactic BP 450 AW III, Best for DSLR Gear
The ProTactic BP 450 AW III is a protective, modular work bag built for photographers who carry serious equipment. Four access points, a molded structure, configurable dividers, exterior attachment points, and an all-weather cover prioritize gear work over minimalist style.
- Best for: Professional DSLR or mirrorless kits
- Camera gear capacity: Large professional setup, exact fit depends on equipment
- Laptop storage: Up to 16 inches per manufacturer
- Tripod carry: Yes
- Main strength: Protection and multi-point access
- Main tradeoff: Considerable bulk
Why It Works for Camera Gear
Multiple openings let me create different routes to two camera bodies or separate working zones. The SlipLock attachment system is also practical for adding pouches without consuming internal camera space.
The structured shell and dense divider layout suit heavier lenses better than a soft lifestyle backpack. For event work, that predictability is more valuable than a sleek outline.
What Could Be Better
The tactical exterior and boxy profile are not discreet. Once every attachment is used, the bag can become wider and easier to snag.
It also provides far more camera space than a beginner needs, with limited emphasis on clothing or casual belongings.
Best for This Type of Photographer
I would choose it for weddings, events, commercial work, or a DSLR setup with several substantial lenses and accessories.
Who Should Skip It
Skip it for light mirrorless carry, relaxed city travel, or any trip where personal storage matters as much as camera capacity.
Bottom Line
This is the most convincing option for a large working kit. It is not subtle, but its protection and access make sense when missing gear can disrupt paid work.
5. PGYTECH OneMo 2 25L, Best for Drones
The OneMo 2 25L is built for creators carrying a mixture of cameras, drone components, and accessories. Its configurable divider system, quick-access points, expandable front area, and included or bundled shoulder-bag options, depending on package, make it unusually adaptable.
- Best for: Drone pilots, videographers, and multi-device creators
- Camera gear capacity: Configurable camera or drone kit
- Laptop storage: Dedicated storage, exact current fit varies
- Tripod carry: Yes
- Main strength: Flexible creator organization
- Main tradeoff: Complex interior
Why It Works for Camera Gear
The broad opening helps me separate a drone, controller, camera body, lenses, and batteries instead of piling accessories around a single cube. Small battery-focused organization is useful when several similar packs need to be tracked.
Expansion also gives bulkier creator equipment somewhere to go without dismantling the protected camera layout.
What Could Be Better
The abundance of sections can make the bag feel busy. I would spend time arranging it at home and photograph the finished layout before traveling.
For flying, the bag alone does not settle battery rules. DJI’s airline battery guide shows why limits can vary and why the specific carrier’s current policy still needs to be checked.
Best for This Type of Photographer
It best suits drone shooters, YouTubers, and hybrid creators carrying more electronics than traditional photography accessories.
Who Should Skip It
Skip it if you use one compact camera or prefer a simple open cavity with a removable cube.
Bottom Line
The OneMo 2 stands out when the load changes between camera and drone gear. Its flexibility is the attraction, but only if I actually need the extra organization.
6. Think Tank Airport Essentials 26L, Best with Laptop Storage
The current Airport Essentials 26L is a compact, rectangular travel camera backpack for dense equipment carry. Think Tank states that it fits standard camera bodies with three to five lenses, a 16-inch laptop, and a 13-inch tablet.
- Best for: Air travel, assignments, and professional tech carry
- Camera gear capacity: Camera bodies plus 3 to 5 lenses claimed
- Laptop storage: 16-inch laptop and 13-inch tablet claimed
- Tripod carry: Yes
- Main strength: Efficient travel layout
- Main tradeoff: Limited everyday versatility
Why It Works for Camera Gear
The rectangular camera bay uses space efficiently and makes every major item visible. That matters when I am packing for an assignment and want to confirm quickly that each body, lens, and accessory is present.
Its laptop and tablet storage is more purposeful than a single loose sleeve. Security features and travel-oriented handles also suit airports better than a soft hiking pack.
What Could Be Better
Dense rectangular packing encourages overloading. I would weigh the finished bag and verify the exact airline limits rather than assuming “carry-on” guarantees acceptance.
The TSA camera page confirms digital cameras may travel in carry-on bags, but it also tells passengers to check that their airline will accept the item’s size.
Best for This Type of Photographer
It suits working photographers traveling with a laptop, tablet, multiple lenses, and a carefully planned kit.
Who Should Skip It
Skip it if you want a relaxed daypack, substantial hiking ventilation, or generous clothing space.
Bottom Line
This is my pick when camera and editing hardware must travel together in an efficient, assignment-ready layout.
7. Manfrotto Advanced Befree Backpack III, Best for Tripod Carry
The Advanced Befree Backpack III combines a lower rear-access camera section, upper personal compartment, device storage, and a protected expandable side pocket intended for a travel tripod.
- Best for: Travel photographers who regularly carry a tripod
- Camera gear capacity: DSLR or mirrorless with attached 70-200mm f/2.8 and up to 6 extra lenses claimed
- Laptop storage: 15-inch laptop and 9.7-inch tablet claimed
- Tripod carry: Yes, protected side pocket
- Main strength: Integrated tripod solution
- Main tradeoff: Fully loaded shape can feel boxy
Why It Works for Camera Gear
I like that the tripod gets a defined location rather than dangling from improvised straps. Rear camera access improves security while walking, and the upper section keeps soft personal items away from lenses.
An included rain cover adds practical backup when the moisture-repellent exterior is no longer enough.
What Could Be Better
A tripod on one side can pull the load off balance, especially when the opposite side is lightly packed. The claimed lens capacity will also depend heavily on lens diameter and divider arrangement.
Best for This Type of Photographer
It suits landscape, architecture, long-exposure, and travel photographers who regard a tripod as essential rather than optional.
Who Should Skip It
Skip it if you never carry support equipment or want a slim street-photography bag.
Bottom Line
The Befree III gives a tripod a secure, intentional home while preserving separate areas for camera and personal equipment.
8. Tenba Fulton v2 16L, Best for Mirrorless Cameras
The Fulton v2 16L looks closer to a restrained roll-top daypack than a technical camera bag. A rear-access camera compartment, upper roll-top storage, tripod or bottle pocket, and laptop sleeve create a useful urban-travel split.
- Best for: Mirrorless kits and discreet city use
- Camera gear capacity: Mirrorless or DSLR with 5 to 7 lenses claimed
- Laptop storage: Up to 16 inches
- Tripod carry: Yes
- Main strength: Discreet split layout
- Main tradeoff: Rear access slows standing gear changes
Why It Works for Camera Gear
The camera section sits against the back, which makes it harder to open unnoticed in a crowd. I can keep photography equipment below and throw a light layer or travel essentials into the roll-top.
Its appearance attracts less attention than a modular professional backpack, an advantage when I want to blend into a city.
What Could Be Better
Rear access often means putting the bag down or rotating it carefully. The roll-top gives useful flexibility but is slower than a conventional zipper.
The stated lens count is not a promise for seven large lenses. A compact mirrorless collection will use the space very differently from fast full-frame zooms.
Best for This Type of Photographer
It suits mirrorless shooters, students, travelers, and photographers who value a normal-looking backpack.
Who Should Skip It
Skip it if instant side access or a large professional camera bay is essential.
Bottom Line
The Fulton v2 16L makes camera carry feel quiet and everyday-friendly, while still separating fragile equipment from personal belongings.
9. NOMATIC McKinnon Camera Pack 25L, Best for Everyday Creators
The McKinnon 25L uses a structured shell, full rear opening, quick top access, configurable ladder system, and magnetic side pockets. It feels designed for creators who want every piece of equipment to occupy a deliberate position.
- Best for: Organized daily content creation
- Camera gear capacity: Configurable medium to large kit
- Laptop storage: Dedicated sleeve, verify exact device fit
- Tripod carry: Yes
- Main strength: Structured customization
- Main tradeoff: Rigid and substantial
Why It Works for Camera Gear
The ladder system lets me vary how much height belongs to camera equipment versus personal storage. Full rear access makes major rearrangement easy, while top access can keep one camera ready.
The rigid shape helps stop the contents collapsing into each other. For a creator who repeats the same loadout, that consistency feels reassuring.
What Could Be Better
Structure brings bulk. The bag will not flatten into luggage or disappear on my back like a light daypack.
Its many organizational choices can also be excessive for a simple one-camera kit.
Best for This Type of Photographer
It suits YouTubers, commercial creators, and daily shooters who carry a predictable mix of camera, audio, batteries, laptop, and small support equipment.
Who Should Skip It
Skip it for long hikes, ultralight travel, or beginner kits that need only a compact insert.
Bottom Line
The McKinnon 25L is strongest when I want repeatable, structured organization and do not mind carrying a firmer backpack.
10. Brevitē Jumper, Best Budget-Friendly Everyday Option
The Jumper takes a casual daypack approach to camera carry. Its understated shape, camera compartment, laptop storage, and quick-access design suit smaller kits without making the owner look ready for a commercial production.
- Best for: Beginners, students, and casual creators
- Camera gear capacity: Small mirrorless or DSLR kit
- Laptop storage: Included, current fit depends on version
- Tripod carry: Yes
- Main strength: Normal daypack appearance
- Main tradeoff: Not built for a large professional load
Why It Works for Camera Gear
I like this style for a body, one or two compact lenses, batteries, and everyday belongings. The bag does not force a beginner to carry a large empty foam grid “for future gear.”
Its discreet design also transitions into school, commuting, and casual travel more naturally than a tactical camera backpack.
What Could Be Better
The softer, simpler build is not what I would choose for long lenses, multiple full-frame bodies, or rough outdoor use. Smaller accessory pockets may also become crowded once chargers and audio gear join the kit.
Best for This Type of Photographer
It suits beginners, students, compact mirrorless users, and social creators who want camera protection without a professional-looking bag.
Who Should Skip It
Skip it if you need a heavy-duty harness, a substantial hip belt, or protection for a large working kit.
Bottom Line
The Jumper is the most approachable choice here for a small everyday camera setup. Its limitation is also its appeal: it does not behave like an equipment warehouse.
How to Choose the Best Camera Backpack
Start With Your Camera Setup
I begin by placing all likely equipment on a table: body, mounted lens, extra lenses, flash, drone, controller, batteries, filters, charger, cables, laptop, tripod, and personal items. Then I remove anything carried only from habit.
A small mirrorless kit may need half the padded space of a DSLR with a 70-200mm lens. Buy for realistic use, plus modest growth, rather than an imaginary future collection.
Choose the Right Camera Access Style
- Side access: Fast for street and travel photography, but usually shows only part of the layout.
- Rear access: Secure while worn and excellent for seeing the whole kit, but often requires taking the bag off.
- Top access: Ideal for one ready camera, though equipment deeper inside remains slower to reach.
- Full clamshell access: Excellent for packing and inventory checks, but exposes more gear when opened.
I choose the access method that matches the moment I most often reach for a camera, not the one that looks most impressive in a product video.
Check the Divider System
Dividers should fit the shape and weight of the equipment. I test mentally whether a mounted lens will rest on its barrel, mount, or camera body and adjust support accordingly.
Removable cubes are better when the bag must convert to normal use. Integrated dividers are usually faster when the backpack always carries camera gear.
Think About Comfort Under Weight
I look for contoured straps, a sternum strap, a firm back panel, and a hip belt on larger outdoor models. Load lifters are useful only when the backpack structure and harness are designed to support them.
A deep bag that pulls backward can feel heavier than a taller, closer load of the same weight. Good internal organization should keep the densest lenses close to the back.
Look at Laptop and Tech Storage
The stated screen size is only a guide. Laptop thickness, protective cases, and unusual dimensions can change the fit.
I also check whether a hard drive, charger, card reader, cables, and tablet have logical homes. For editing on location, these are working tools, not afterthoughts.
The Adobe guide to photography backup explains why redundant storage matters. A beautifully organized bag cannot recover a failed card or missing drive.
Consider Tripod and Bottle Storage
Some side pockets can hold either a tripod or water bottle, not both. Front tripod carry preserves the bottle pocket but may block the main opening or pull weight outward.
I pack the tripod before judging usable capacity. A secure lower cup plus an upper compression strap is generally more stable than one loose strap.
Think About Weather Protection
Coated fabric, protected zippers, raised seams, a durable base, and a rain cover each solve different parts of the problem. “Weather resistant” should never be read as permission to leave the bag in heavy rain.
Temperature changes matter too. Nikon’s camera-care guidance is a helpful starting point for protecting equipment and keeping it clean.
Decide How Much Everyday Space You Need
An all-camera interior is efficient for paid work. It is frustrating during travel if a jacket, medicine, or lunch has nowhere to go.
Split bags suit me when photography is part of the day. Full camera bays suit me when photography is the purpose of the day.
Match the Backpack to Your Photography Style
- Travel photography: Prioritize carry-on dimensions, laptop access, security, and personal space.
- Street photography: Favor discreet styling and quick side or top access.
- Wedding photography: Look for two-body organization, fast lens changes, and clear battery storage.
- Hiking and landscapes: Prioritize harness fit, weather protection, water, tripod carry, and room for layers.
- Drone work: Check controller, battery, propeller, and aircraft dimensions separately.
- YouTube and vlogging: Plan for microphones, lights, audio recorders, cables, and a small tripod.
- Beginner setups: Choose a compact, flexible layout rather than carrying empty padding.
- Daily creative work: Balance camera storage with laptop, notebook, headphones, and lunch.
Drone users should also check current rules before travel. In the United States, the FAA’s recreational drone guidance explains registration and operating responsibilities.
Camera Backpack Access Types Explained
Side Access Camera Backpacks
Side access is my favorite for movement. I can slide one strap off, rotate the pack forward, and reach a prepared camera without putting the bag down.
The compromise is a smaller door. Large bodies, cages, or long mounted lenses may not pass through it comfortably.
Rear Access Camera Backpacks
Rear access places the zipper against my back while the bag is worn, which improves security in crowded places. It also exposes the full divider layout and keeps the harness away from dirty ground when opened face-down.
The tradeoff is speed. I normally need to remove or rotate the backpack before changing equipment.
Front Access Camera Backpacks
Front access can be wide and easy to pack. It works well at home, in a studio, or from a vehicle.
On wet or dirty ground, however, the back panel may face downward while the front is open. It can also reveal the whole kit in a busy public place.
Modular Camera Backpacks
Modular bags use a removable camera cube or core unit. I like them for trips where camera space changes from day to day, and the cube can sometimes move into another backpack or suitcase.
The drawback is duplicated fabric, zippers, and padding, which can reduce usable space and add weight.
Camera Backpack Checklist
- Padded camera compartment
- Adjustable dividers that grip securely
- Enough room for the actual body and mounted lens
- Safe slots for additional lenses
- Suspended laptop sleeve if needed
- SD card, battery, and cable organization
- Quick access that fits the prepared camera
- Comfortable shoulder straps
- Sternum strap for stability
- Supportive back panel
- Functional hip belt for heavy hiking loads
- Secure tripod carry if needed
- Weather-resistant exterior
- Rain cover for prolonged exposure
- Space for a jacket, food, and daily essentials
- Water bottle pocket that remains usable
- Secure or lockable zippers where needed
- Airline-compliant dimensions for the specific carrier
- Durable, padded base
- Layout that leaves room to grip each item
For outdoor shoots, I also follow Leave No Trace principles and keep the bag, tripod, and my own movement away from fragile ground.
Common Mistakes When Buying a Camera Backpack
Buying Too Much Camera Space
Empty padded bays encourage overpacking. They also steal room from water, layers, and normal travel gear.
Ignoring Empty Weight
A heavily structured bag may feel impressive before one camera enters it. I compare empty weight before adding the dense load.
Forgetting Loaded Comfort
Trying on an empty bag proves very little. Use similar-weight objects and walk around safely before removing labels.
Overlooking Laptop and Drive Storage
A sleeve that fits the laptop but crushes cables and drives is only half a solution.
Assuming Tripod Carry Is Universal
Check the folded length, leg diameter, attachment points, and whether the tripod consumes the bottle pocket.
Choosing the Wrong Access
Rear access may be secure but slow for street work. Side access may be fast but poor for a large cinema rig.
Trusting Lens Counts Too Literally
Five small primes and five fast zooms are entirely different loads. Compare internal measurements with your actual equipment.
Ignoring Rain and Dust
A rain cover, sealed accessory pouch, and cleaning kit may matter more than another divider.
Choosing Looks Over Workflow
A beautiful bag becomes irritating if I miss shots while fighting its closures.
Forgetting Water
Hydration should not sit loose beside batteries and lenses. Confirm that the bottle pocket still works when the bag is full.
Leaving No Room for Growth
Allow a little space for one realistic addition, such as a lens or microphone, but do not buy an expedition pack for a hypothetical studio.
Final Verdict: What Is the Best Camera Backpack?
Among the best camera backpacks, the Peak Design Everyday Backpack 20L is my best overall choice for its quick access, flexible dividers, and ability to work as a genuine everyday bag.
I would choose the WANDRD PRVKE 31L for travel photography, the Tenba Fulton v2 16L for a discreet mirrorless kit, and the Lowepro ProTactic BP 450 AW III for substantial DSLR or professional equipment.
For drones and mixed creator gear, the PGYTECH OneMo 2 25L offers the most adaptable organization. The Shimoda Explore V2 30 is the strongest hiking choice, while the Think Tank Airport Essentials 26L makes the most sense for camera equipment plus serious laptop and tablet carry.
The Brevitē Jumper is easier to recommend to beginners and casual creators because it does not overwhelm a small setup. The right answer ultimately comes from the kit and shooting routine, not the ranking alone. I would pick the smallest bag that protects my real equipment, carries comfortably, and lets me reach the camera naturally.
FAQs About the Best Camera Backpacks
What is the best camera backpack for most photographers?
The Peak Design Everyday Backpack 20L is the best all-round choice in this guide because it balances camera protection, quick side access, laptop carry, and normal daily use. Photographers with large lenses, outdoor equipment, or significant clothing needs should choose a more specialized bag rather than forcing everything into one general-purpose design.
What should I look for in a camera backpack?
Start with secure padding, dividers that fit your actual equipment, a durable base, and an access style that matches how you shoot. Then check loaded comfort, laptop fit, tripod and bottle carry, weather protection, and space for personal items. The best layout should protect gear without slowing down every lens change.
Are camera backpacks worth it?
Yes, when you carry multiple fragile or expensive items. A proper camera backpack controls movement, separates lenses, and organizes batteries and cards far better than a loose daypack. A normal backpack plus a quality padded cube can still be the smarter value for one small camera, especially if photography is only an occasional activity.
Can I use a normal backpack for camera gear?
You can use a normal backpack with a well-fitted padded camera cube. The cube should protect the sides and base, stay stable inside the bag, and prevent equipment from colliding. Avoid loose cameras, unsupported lenses, and batteries mixed with metal objects. This modular approach works particularly well for light kits and mixed travel packing.
What is the best camera backpack for travel?
The WANDRD PRVKE 31L is my travel pick because its camera cube, side access, clamshell opening, and expandable personal area handle mixed packing well. Always check the packed dimensions and weight against the specific airline. The IATA battery guidance also recommends keeping cameras and spare batteries in hand baggage.
What size camera backpack do I need?
A compact kit with one mirrorless body and two lenses may fit in a small daypack or 10 to 16L camera bag. Medium mixed kits often suit roughly 20 to 30L bags. Capacity labels are not directly comparable because padding and shape differ, so map your actual equipment against the divider layout before buying.
Are camera backpacks good for laptops too?
Many are, but device protection varies. Look for a suspended, padded sleeve and confirm the laptop’s full dimensions, including any case. A separate laptop opening is helpful at security because it avoids exposing the camera compartment. Also check where chargers, SSDs, card readers, and cables will sit without pressing against the computer.
What is better, side access or rear access?
Side access is better for quick shooting because the bag can rotate forward while one strap stays on. Rear access is better for security and complete visibility of the gear layout. I prefer side access for streets and travel, rear access for hiking and deliberate lens changes, and a bag offering both when the budget allows.
Do camera backpacks fit drones?
Some do, but “drone compatible” is not one universal size. Measure the folded aircraft, controller, batteries, charger, and propellers, then recreate those shapes in the divider plan. Keep batteries protected and verify airline rules. Larger models such as the PGYTECH OneMo 2 are designed around mixed camera and drone equipment.
Are camera backpacks waterproof?
Most camera backpacks are weather resistant, not waterproof. Coated fabric and protected zippers can handle brief light rain, while a rain cover offers better protection in sustained weather. Water may still reach the harness side or enter when the bag opens. For serious exposure, use sealed inner pouches and keep vulnerable electronics dry.
![10 BEST Budget Travel Backpacks [My TOP Picks]](https://thebloggingtraveller.net/wp-content/uploads/2026/07/ChatGPT-Image-Jul-17-2026-10_24_30-AM-1-1-768x432.png)
![7 BEST Kids Backpacks for School [My TOP Picks]](https://thebloggingtraveller.net/wp-content/uploads/2026/07/ChatGPT-Image-Jul-16-2026-10_37_09-PM-1-768x432.png)
![9 BEST Backpacks for Sports and Gym Gear [2026]](https://thebloggingtraveller.net/wp-content/uploads/2026/07/ChatGPT-Image-Jul-15-2026-10_11_57-PM-1-1-768x432.png)
![8 BEST Hiking Backpacks for Men [My TOP Picks]](https://thebloggingtraveller.net/wp-content/uploads/2026/07/ChatGPT-Image-Jul-19-2026-11_01_12-PM-1-768x432.png)